 EN
 fr
 es
 ru
 ar

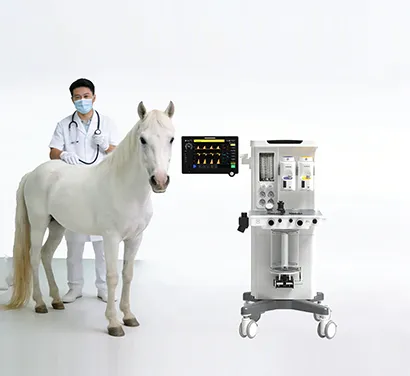
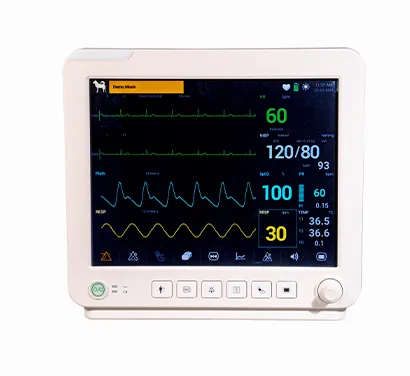
A leaking circuit has three consequences: the patient receives less agent than the dial indicates, so depth is unpredictable; waste gas escapes into the room rather than the scavenging system; and manual or mechanical ventilation becomes ineffective. None of these is obvious while it is happening.
Testing a circle (rebreathing) system
This is the standard procedure. Perform it before every use.
- Inspect first. Look over hoses, bag, connectors and the absorber canister for cracks, perishing or a loose seal.
- Assemble the circuit fully. Hoses on the inspiratory and expiratory ports, reservoir bag on the bag port. Test the system as it will be used.
- Close the pop-off (APL) valve and occlude the patient end with a thumb or palm. Do not use a pop-off occlusion button for this: it vents at a set pressure and will mask a real leak.
- Pressurise to 30 cmH₂O on the manometer using the flowmeter, then turn the flowmeter off. If you are testing with scavenge tubing attached, use the flowmeter rather than the oxygen flush — the sudden pressure from a flush can damage internal components.
- Hold and watch the manometer for at least 15 seconds. The reading should stay constant.
- Interpret the result.
- Pressure falls: there is a leak. Turn the flowmeter up until the needle stops dropping. If a flow of 300 mL/min or less holds the pressure, the system passes. More than that, find and fix the leak before use.
- Pressure rises: the flowmeter or flush valve is leaking through.
- Release pressure properly. Open the pop-off valve slowly and watch the bag deflate. Do not simply lift your hand off the patient port.
| Test pressure | 30 cmH₂O |
|---|---|
| Hold time | At least 15 seconds |
| Acceptable leak | Held by an oxygen flow of 300 mL/min or less |
| Frequency | Before every anesthetic |
| Equipment required | A working manometer and a functioning APL valve — a machine without both cannot be tested |
Locating a leak once you have found one
The pressure test tells you a leak exists; it does not tell you where. Two practical methods:
- Soapy water. Spray along the gas path with the circuit pressurised and watch for bubbles. Cheap, effective, and good for connections, the absorber seal and hose junctions.
- Halogenated hydrocarbon (refrigerant) leak detector. More sensitive than smell for leaks downstream of the vaporizer, where the escaping gas contains agent. Worth having in a practice that does a lot of anesthesia.
The usual culprits, in rough order of frequency: the absorber canister seal and its gasket, hose-to-port connections, a perished reservoir bag, the one-way valve discs and seats, and the vaporizer mounting o-rings.
Testing the one-way valves
A stuck or incompetent one-way valve lets exhaled gas travel backwards around the circle, so the patient rebreathes CO₂ even with fresh absorbent. On a capnograph this shows up as inspired CO₂ above zero — which is why the 2025 ACVAA guidance that inspired CO₂ should be at or near 0 mmHg doubles as a valve check during the case.
To test before use, pressurise a leak-tested bag to 30 cmH₂O and occlude selectively: for the inspiratory valve, occlude the bag port; for the expiratory valve, occlude the inspiratory port. An intact valve keeps the bag inflated.
Testing non-rebreathing circuits
| Bain coaxial (with Bain block) | Run the standard pressure check, then verify the inner tube. Occlusion test: flowmeter at 2 L/min, pop-off closed, occlude the inner tube at the patient end for no more than 2–5 seconds and observe the flowmeter float. Oxygen flush (Pethick) test: fill the bag, turn the flowmeter off, release the patient end and activate the flush — the bag should deflate slightly. If it inflates instead, the inner tube may be detached. Discard the circuit if inner tube integrity is in doubt. |
|---|---|
| Jackson Rees | Use the circle pressure method. With no standard manometer fitted, overfill the bag for 15–30 seconds and watch for leaks, then open the pop-off to release. A disposable manometer can be added to make this quantitative. |
The inner tube of a coaxial circuit is the failure mode worth understanding: if it detaches, fresh gas is delivered to the wrong end of the circuit and the patient rebreathes heavily, with no external sign. This is why the inner-tube check is a before-every-use item, not an occasional one.
A maintenance schedule
| Before every anesthetic | |
|---|---|
| Circuit leak test | 30 cmH₂O, 15 seconds, ≤300 mL/min |
| One-way valves | Visual check that discs are seated and moving; pressure-decline test |
| Coaxial inner tube | Occlusion or flush test on Bain circuits |
| Oxygen supply | Cylinder contents or concentrator running; reserve available |
| Vaporizer | Agent level checked and filled; dial moves freely |
| Scavenging | Connected, and active system running or charcoal canister within weight limit |
| Daily to weekly, by caseload | |
| CO₂ absorbent | Replace after about 8 hours of use. Track hours and watch inspired CO₂; do not rely on the colour indicator, which can revert after the canister rests |
| Charcoal canister | Weigh and replace at the manufacturer's stated gain. A saturated canister scavenges nothing while looking identical |
| Circuit hygiene | Clean and dry hoses and bags per protocol; inspect for perishing |
| Periodically | |
| Vaporizer calibration | At the manufacturer's stated interval. Establish who performs it in your country before you need it |
| Oxygen cylinder inspection | Per national pressure-vessel regulation |
| Concentrator service | Filters and sieve per manufacturer schedule; keep moisture and oil out of the air stream, as contamination requires sieve replacement |
| Full machine service | At the manufacturer's interval, including internal low-pressure leak testing beyond what the circuit test covers |
What a leak test does not cover
The standard test pressurises the breathing system from the common gas outlet onward. It does not test the machine's internal low-pressure circuit — the path from the flowmeter through the vaporizer to the outlet — which requires a different procedure, usually a negative-pressure test with a suction bulb, and is part of periodic service rather than daily checking.
It also does not verify that the vaporizer delivers the concentration shown on the dial. Only calibration against an agent analyser does that. A machine can pass its leak test perfectly and still deliver the wrong concentration.
Frequently asked questions
How often should an anesthesia machine be leak tested?
Before every anesthetic. The 2025 ACVAA guidelines place a pre-anesthesia equipment check within minimum monitoring and recommend a standardised pre-anesthetic checklist that includes equipment. The test itself takes well under a minute once it is routine.
What is an acceptable leak rate?
A leak that can be held by an oxygen flow of 300 mL/min or less at 30 cmH₂O is generally considered acceptable. Anything requiring more flow should be found and fixed before the machine is used.
Why should I not use the pop-off occlusion valve during the test?
Because it is designed to vent at a set pressure. During a leak test it can release gas at the test pressure and make a genuinely leaking system appear to pass. Occlude the patient port manually instead.
Can I leak test a machine that has no manometer?
Not properly. The test depends on pressurising to a known 30 cmH₂O and watching whether that reading holds. A machine without a manometer cannot be tested to this standard and cannot meet the ACVAA minimum for ventilation monitoring, which lists an airway pressure manometer explicitly. If you are evaluating a machine for purchase and the manometer is an option rather than standard, treat that as a significant finding.
My capnograph shows inspired CO₂ above zero. What does that mean?
Almost always a machine fault rather than a patient problem. The two common causes are exhausted CO₂ absorbent and an incompetent one-way valve. Both are correctable during the case: change the absorbent, and check the valve discs. The 2025 ACVAA guidelines state that inspired CO₂ should be at or near 0 mmHg.
How long does soda lime actually last?
Roughly eight hours of use is the usual working figure, but it varies with patient size, fresh gas flow and canister capacity — a large patient on low flow exhausts absorbent faster than the hours suggest. Track hours, watch inspired CO₂, and treat the colour indicator as the least reliable of the three signals.